Implementing Event-Driven Architecture in TypeScript with Node.js and Express
If you are familiar with the solid principles you know that S stands for single responsibility which means that a function or method should be focused on performing a single action. This being said, if you needed to perform other actions when a specific action occurs how would you do that? Enter Event-driven Architecture! The idea here is that those other actions that you want to carry out when this specific action occurs are defined in an event, and when this specific action occurs, you just announce that it has happened and then it triggers the other actions to get carried out
I was working on my final year project on an online auction platform and I needed to update the list of auctions a market database has whenever an auction is created. One approach was to directly update the market database, directly from the method where I created the auction. This would have been probably easy to go on with, but then this does not make your code neat or scalable, moreover it doesn't allow modularity in your code.
This was what led me to my discovery of Event-driven architecture. It helps your code to be more readable, easy to scale, and maintain. More interestingly, if the actions in these events break or fail to get carried out when the main action occurs, the main action still gets carried out and your system doesn't crash. It’s just the parts of these events that would fail while the rest of your program keeps working fine. EDA provides fault tolerance and resilience to failures. Amazing, ain’t it?
So just a breakdown before we start coding, to implement this we would have a method that performs an action and then declares the occurrence of an event and another file that contains these events. Finally, anywhere we call this method, we would have to initialize our event handler. So in summary we would have 3 files, one that contains our methods, another that contains our events, and finally one that calls our method.
I would be demonstrating this by creating a simple server using Express that just logs some messages whenever a particular endpoint is accessed. I would be implementing this in typescript and would be using the events package to emit these events. So create a folder and run
npm init -y
Next up install typescript using
npm install typescript
Next up create 3 files: services.ts, events.ts, and index.ts. To run our typescript codes I’ll be using the ts-node-dev module. You can install that using
npm install ts-node-dev
Next, we install the events library using
npm install events @types/events
Once this is done let’s go to our package.json and adjust some things. First would be to adjust the main to index.ts then in our Scripts section we create a new key: dev with these attributes: ts-node-dev — respawn — transpile-only index.ts. You should have something similar to what is in the image below

Finally, we would install Express using
npm install express @types/express
Next up, go into the events file, and let’s create our event. You can type/paste in the code below and I’ll explain what it does
import {EventEmitter} from 'events

export class EventHandlers{

    private eventEmitter: EventEmitter;

    constructor(eventEmitter: EventEmitter){
        this.eventEmitter = eventEmitter;
    }

    registerRouteEventHandlers() {
        console.log('Events FiredUp')

        this.eventEmitter.on('routeAccess', (route) => {
            try{
                this.anounceRouteAccess(route);
                this.upgradeSecurity(route)
            }
            catch(error){
                console.log('An error occured while perform Route accessed actions')
            }
        });
    }

    private anounceRouteAccess( route: string){
        console.log(`${route} has been accessed`)
    }


    private upgradeSecurity(route: string){
        console.log(`Locking all other routes and initiating higher security measures on ${route} route`)
    }

}'
First, we import the event emitter. Next up we create a class EventHandlers. After that we create an eventEmitter property and assign the EventEmiiter type to it and also make it private to this class, so it can only be accessed within this class. Next, we initialize this event using a constructor, assigning the eventEmitter property of our class to the eventEmitter supplied. Next up we create our method ‘routeEventHandlers’ which would listen for all events as regards route access. We could have multiple methods for handling different events.
Inside the ‘registerRouteEventHandlers’ method we just print a message to show that this event handler is up and running. Then we define our events. We would be going with just one event for now ‘routeAcess’. We can take in data that will be passed/sent anytime the occurrence of this event is declared. For this case, we would be supplying the route's name. With this information, we can perform various actions, but for the sake of this article, I would just be printing simple messages. Our event would perform 2 actions, one would be a function that announces that a route has been accessed, and another that announces that we are upgrading security.
For error handling, we would be using the try-catch module so if any occurs we can catch it. These functions would be private to this class alone. We use the ‘this’ keyword because we are referring to instance properties of the class.
Finally, we would create our functions, which said ab into (from the beginning) are private to this class. They take in the route name and print simple messages. You can always replace these messages with the actions you want to perform.
Next up, we move to our service file. You can type in these codes and I’ll explain what they do
import {EventEmitter} from 'events

export class MyService{

    private eventEmitter: EventEmitter;

    constructor(eventEmitter: EventEmitter){
        this.eventEmitter = eventEmitter
    }

    accessRoute (routeName: string ){
            try{
                console.log(`Opening ${routeName} Route`)
                this.eventEmitter.emit('routeAccess', routeName);

            }
            catch(e: any){
                console.log(e)
            }
    }

}'
First, We import the EventEmitter from the events. We then create our class and then create an eventEmitter property private to this class that we would use to declare the occurrence of our events. We then initialize it using a constructor. Next up, we create a method that takes in the route’s name. In this method, We would simply just print a basic message, and then emit(declare/announce) the event ‘routeAccess’.
Finally, we move to our index file. For the last time, you can type/paste this code and I’ll explain what it does
import express, {Request, Response} from 'express
import {EventHandlers} from './events'
import {MyService} from './services'
import {EventEmitter} from 'events'

const app = express()

const eventEmitter = new EventEmitter();

const eventHandler = new EventHandlers(eventEmitter)
const myService = new MyService(eventEmitter)

eventHandler.registerRouteEventHandlers()

app.get('/start', (req: Request,res: Response) => {
    try {
        myService.accessRoute('start')
        return res.status(200).json({"message" : "Welcome to EDA"})
    } catch (error) {
        return res.status(500).json({"message" : "An Error Occured on The Server"})
    }

})

const PORT = 8083

app.listen(PORT, ()=>{
    console.log(`Server Running on Port ${PORT}`)
})'
Here we first import express, the request and response types, then the eventHandlers we created from our event file, then our service class from the service file. Finally, we import the EventEmitter from the events package.
Next up, we create an instance of our express app. Then instances of the EventEmitter, our EventHandler, and our service. Next, we call the registerRouteEventHandlers method from the instance of the event handler we created. This now starts listening for events. Before I move on, for every instance of EventHandler and MyService we create, we pass in the eventEmitter because of the eventEmitter property they both posses. Next, we create an endpoint that listens for requests. Then inside it call the accessRoute method. Then finally listen for requests.
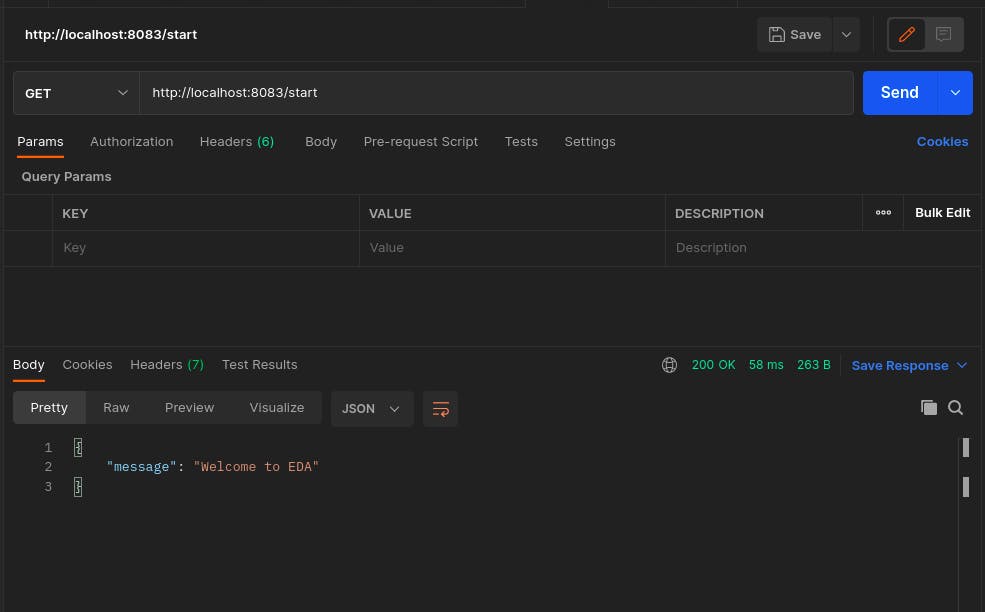
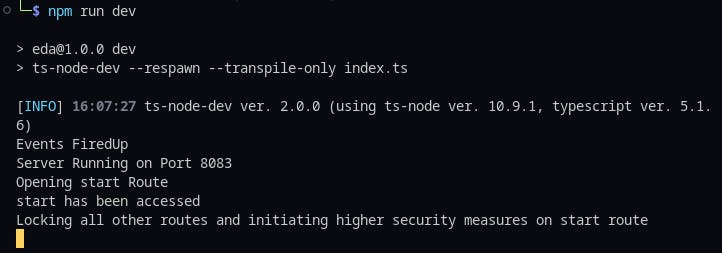
You can start the server using the npm run dev command, when you hit the start route using postman or any other option of your choice you can see the Event Handling in action


So that’s How you handle events in NodeJs. Hopefully, this has been helpful Thank you for reading till this point. Let me know your thoughts in the comment section. You can find the complete code on my Github Repo here. Happy Hacking!
Credits: I got the Cover Image from FreePik you can check it out here
